

How to Photograph Car Glass Damage Clearly
A windscreen chip can look tiny from the driver’s seat, then appear far more serious in a blurry photo. Knowing how to photograph car glass damage properly gives a repair specialist what they need to make a quick, honest first assessment - often before you have even left your drive or workplace.
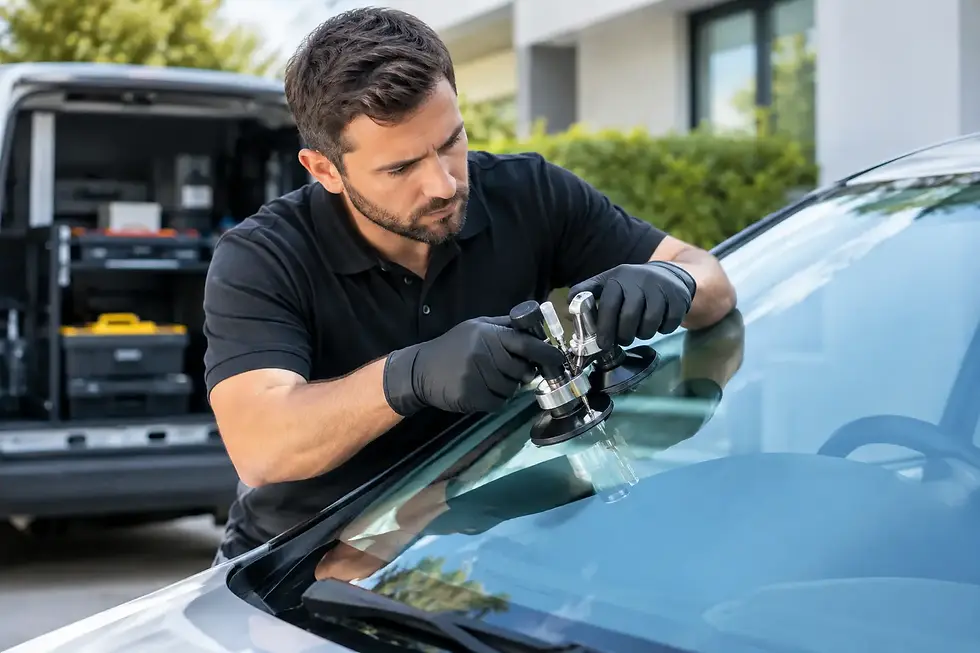
For a stone chip, the aim is not to take a perfect photograph. It is to show the damage clearly, prove where it sits on the windscreen and give a sensible idea of its size. A few well-taken photos can save back-and-forth messages and help you find out whether a mobile repair is likely to be the right option.
Photograph Car Glass Damage Before It Spreads
A chip can turn into a crack with very little warning. A sharp temperature change, a pothole, slamming the door or simply the flex of normal driving can put extra pressure on damaged glass. That is why it makes sense to take photos as soon as you spot the mark, even if you cannot arrange a repair immediately.
If the damage is on the windscreen, photograph it before washing the car or picking at the broken glass. Do not push dirt, water or cleaning product into the impact point. Resin needs a clean, dry route into the chip to achieve the best possible result.
If rain is due, cover the outside of the chip with a small piece of clear tape. Apply it lightly and only to keep moisture out. Do not use duct tape, stickers or anything that leaves glue across the damaged area.
Start With a Clean, Safe View
Park somewhere safe, switch off the engine and take the photos from outside the vehicle. Avoid photographing the chip while standing in live traffic or at the side of a busy road. If the damage sits directly in your line of sight, or the screen has a long crack, drive only as necessary until you have received advice.
You do not need specialist camera equipment. A smartphone is ideal. Wipe away loose dust and water from the outside of the glass with a clean cloth, but do not scrub the chip itself. Then check your camera lens is clean. A fingerprint on the lens can make even a large bullseye chip look like a smudge.
Bright daylight is helpful, but direct sun can create glare and reflections. An overcast day often produces the clearest image. If the sun is out, stand so your body casts a little shade over the chip, without blocking the view completely.
Take Three Photos, Not Just One
One close-up rarely tells the full story. The best photo assessment usually comes from three different views: a close image of the impact point, a wider shot that shows its position on the windscreen and a size reference beside the damage.
For the close-up, hold the phone around 15 to 30 centimetres from the chip and tap the screen where the damage appears so the camera focuses there. Take two or three shots from slightly different angles. Windscreen glass is reflective, and moving just a few centimetres can reveal cracks that were invisible in the first picture.
For the wider photo, step back far enough to show most of the windscreen and include a little of the bonnet, roofline or wiper blades. This helps show whether the chip is near the edge of the glass, close to a sensor, or within the driver’s main viewing area. Position matters as much as size.
Finally, take a photograph with a coin or ruler held next to the chip, not on top of it. A £1 coin can be useful as a simple reference. Keep it against the glass but avoid covering the damaged centre, as the impact point and any legs or cracks need to remain visible.
Show the Damage From Inside and Outside
Most stone-chip assessments are based mainly on the outside view, because that is where the impact normally occurred. Still, an inside photo can be useful, particularly if there is a long fine line that is hard to see from outside.
Sit in the passenger seat or stand safely beside the open door, then photograph through the glass towards the chip. If you can feel the damage only on the outside, mention that. If a crack is visible from the inside too, include that in your message.
Do not worry if the inside picture looks less sharp. Its job is to confirm the damage location and give another view of the crack pattern. The outside close-up remains the key image.
How to make a chip stand out in a photo
Windscreen chips can disappear against clouds, trees and reflections. Hold a dark jacket, a sheet of card or even your hand a short distance behind the glass on the opposite side of the chip. This can create contrast and make the fracture lines easier to see.
Do not press anything hard against the screen. The glass around a fresh impact is already under stress. A gentle background is enough.
Avoid flash where possible. Flash often bounces straight back from the windscreen and hides the detail you are trying to show. Natural light, shade or a well-lit garage usually works better.
What Your Photos Need to Reveal
A trained chip repairer will look for the type, size and position of damage, along with signs that moisture or dirt may have entered the break. The photo does not need to diagnose the chip for you, but it should make these details visible.
Common repairable patterns include bullseye, half-moon, petal, star and cross-hair chips. Small long cracks can sometimes be repaired too. Each pattern reacts differently when resin is introduced, so a clear image helps set realistic expectations before an appointment is booked.
A windscreen repair is generally more likely to be suitable when the damage is smaller than a £2 coin, away from the outer edge of the glass and not heavily contaminated. Damage at the edge is more likely to affect the strength of the screen, while a larger crack can continue to travel after repair work begins. In those cases, replacement may be the safer route.
Photos are an assessment tool, not a promise that every chip can be repaired. A specialist still needs to inspect the glass in person. This is especially true if the impact is directly over a camera or sensor, if there are several overlapping cracks, or if the glass has already been repaired in the same spot.
Add a Short Message With the Photos
The clearest photos work even better with a few practical details. Include your vehicle make, model and registration year if known, when the chip happened and whether it has changed since. Mention if the vehicle has been parked outside in rain, driven a long distance, or exposed to very hot or cold weather after the impact.
It also helps to say where the damage sits from the driver’s perspective: low passenger side, near the rear-view mirror, close to the edge, or directly in front of the driver. A specialist can then give a more useful initial answer rather than guessing from reflections in the glass.
If you need a repair at home or work, include your town and when the vehicle is available. For drivers across Hampshire, Surrey and Berkshire, that makes it easier to arrange a visit around a commute, school run or working day.
Mistakes That Make Assessment Harder
The most common problem is sending one distant photo taken through a dirty windscreen. It may show that there is damage, but not whether it is a small stone chip, a spreading crack or simply a reflection.
Another issue is photographing at night under a streetlamp. The light can make a chip look larger or conceal the fine legs of a star break. If you need an urgent answer after dark, send the best image you can, then take fresh daylight photos in the morning if requested.
Do not use portrait-mode blur, filters, screenshots or heavily edited images. They can distort the edges of the damage. Send the original photos from your phone where possible. And do not measure a chip by guessing from memory. A coin or ruler beside it is quicker and more reliable.
What Happens After You Send the Images
A good photo assessment should be straightforward. You send the close-up, location shot and size reference, together with your vehicle details and location. A mobile chip repair specialist can then advise whether the damage looks eligible, what the likely charge will be and whether an on-site repair can be arranged.
For suitable chips, the repair itself commonly takes around 20 to 30 minutes. Professional-grade resin is drawn into the damaged area to stabilise the break and improve the appearance. The original glass is preserved, which avoids the cost, disruption and waste of replacing an entire windscreen when replacement is not necessary.
Chip Repair UK focuses solely on repairable windscreen chips, so the advice is clear: if it is within repair limits, it is worth acting quickly; if it is not, you should know that before wasting time on a call-out.
Take the photos while the chip is still small, keep the damage dry and send clear images rather than waiting for the next crack to give you the answer.


Comments